Logiciel libre de géométrie, d'analyse et de simulation multiplateforme par Yves Biton
Toutes les versions de cet article : [English] [Español] [français]
In the Java version of MathGraph32, the predefined constructions were part of the software when installed on a computer.
With JavaScript version, predefined macro-constructions must be downloaded separately on MathGraph32 web site on this page séparément sur le site de MathGraph32 sur cette page Download of MathGraph32 version 7.9.
On the plus side : you ca add your own macro-constructions or delete macro-constructions you don’t need.
You may directly donload the constructions underneath.

unzip this file in a directory and memorize the location.
We will now use two predefined macros to show a few features .
The principle is what follows : To use a macro-construction contained in a mgc file, you must first incoporate this construction in the figure. Then you may use it.
Start MathGraph32 and use icon  to create a new figure with a frame.
On the right side of the upper toolbar, click on icon ![]() .
.
This toggle icon makes available (or hidden) new tools under the main top toolbar.
Click on icon  and choose Incorporate construction from file.
A dialog box pops up.
Fetch the directory where the zip file containing the constructions has been unzipped.
In this directory, open directory Frames.
Click on the mgc file named Grid in Frame then click on button Open (vous you may also double-click on the file name).
This construction is now part of your figure and will be saved along with it if you save your figure in a mgj file. You can see the constructions available by clicling on icon and choosing Modifiy the informations of a construction.
Let us now use this macro-construction in our figure.
Click again on icon and choose Implement a construction of the figure. A dialog box pops up. Select the construction in the list (it is already selected since it is the only construction) the click on button Implement.
Now, to each source object of the construction, you have to assign a compatible object of the figure or, if possible, assign a formula to this source object.
In the image above,we are assigning the fomula -6 to the first source object which is mini value in abscissa.
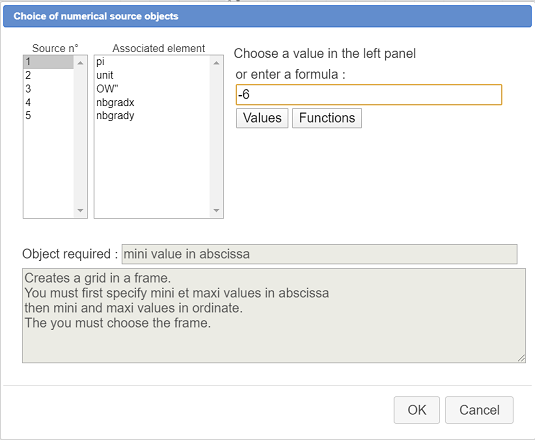
Proceed in the same way to assign :
– 6 as formula for the maxi value in abscissa
– - 5 as formula for the mini value in ordinate
– 5 as formula for the maxi value in ordinate
Now in the sources objects list, click on number 5 and get him assigned the (O ;I,J) frame as shown above :
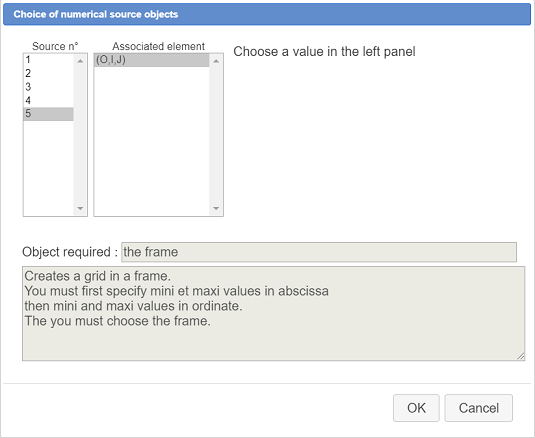
Then you can validate the dialog box. You can now see the grid generated by the macro-construction.
If you use tool  of the upper toolbar (protocol of the figure), you will see that the two final objects generated by this construction are two oject locuses. If you check the checkbox Intermediary objects you will see that a lot of objects have been created to generate the final result.
Do as shown before to incorporate a new macro-construction from a file in the figure.
This time, browse to directory Conics and choose the construction named Conic through 5 points.
With tool  add five free points to the figure.
Click again on icon and choose Implement a construction of the figure. A dialog box pops up. Select in the list the construction ConicThrough5Points and click on button Implement. You are now ask to click on five points : click on the five free points you just added to the figure.
The conic representation is in fact a point locus.
If you want to modify the number of points used to generate this locus you can use tool  of the upper toolbar and then click on the point locus.
You can also modify it’s color and line style by selecting the color and line style you wish to apply, then clicking on icon  of the upper toolbar and clicking on the point locus.
 Accueil
 Présentation
 FAQ
FAQ Contact